Great guide here with more thorough information (I “borrowed” the script below from this page):
How it works
The VNC Password is stored in the folder “/tmp/.qnap/vncpassword” on your running Ubuntu instance. In the terminal on your Ubuntu instance you can view the temporary password by running the command:
sudo more /tmp/.qnap/vncpassword
Note that the Password changes when you restart Linux Station or the Ubuntu instance.
How to change to a permanent VNC password
Create the file setmyvncpassword.service on the Ubuntu instance:
I tried to find a QNAP Download Station client (chrome plugin) but I couldn’t. Though Download Station is great, I think it’s simpler to right click on a link and do a selection instead of copy and pasting a URL to a web interface. There’s a great substitute though, Transmission:
Picture 1. Chrome Transmission plugin right click menu drop-down.Picture 2. Transmission Client GUI.
The pictures above is actually from the chrome extension Transmission easy client which I prefer, there are other great transmission clients as well (even great ones for your phone). This client I actually got to work with SSL encryption through a NGINX reverse proxy, more on that later.
Install Transmission (server) through docker
I actually once had transmission installed locally on my QNAP NAS, but a QNAP update made it stop working and i couldn’t find it in the QNAP app-store anymore. That’s no biggie as I find it better running most things in docker containers. I used the docker image linuxserver/transmission but there are many other great similar containers.
The only thing you need to think about concerning settings are the volumes (shared folders) settings. I mapped the following Docker container folders “/config”, “/download” and “/watch” to local folders on my NAS, see below:
I don’t use the “/watch” folder today, but maybe I want to use it later on.
Tip: I once created the local NAS folder “/share/Container/volumes” to put all my mapped docker volumes in. This is because I too many times accidentally removed containers and by so deleting configs etc.
Now press “create” wait until container starts, hurrah!
Configure Transmission (server)
In the local folder you mapped “/config” to you will find the file settings.json. Edit this file and change field “rpc-password” and “rpc-username” to something else. Restart the transmission docker container, at startup transmission will detect the new none encrypted password and will automatically encrypt for you. If you edit the settings file again the password row will now display a something like “rpc-password”: “{a0a67ed23dfae8d511837326f938567ce86a9b074Qn2t/Hr” (encrypted version of your password).
Go to transmission web GUI, I had setup the Transmission container to use it’s own IP-address, so my URL was: http://192.168.2.3:9091 (default port is 9091).
Picture 4. Transmission server web GUI.
There you go, done!
Setup Transmission easy client extension for Chrome
Install the Chrome extension Transmission easy client (there are a great client apps for phones too). Right click and select options, change the settings and press “Check the settings” to verify, done!
Picture 5. transmission easy client setup.
Extra credit: Add SSL encryption to Transmisson
If you want to connect to your transmission server from other places than your local home network, I strongly encourage you to use SSL encryption so the password is not sent open over the internet. There are many options on how to accomplish this, you could choose another Docker container with better support for SSL or as in my case use NGINX as a reverse proxy server in front of the Transmission server.
Picture 6.Transmission GUI with SSL.
Notice the green URL link indicating the content is encrypted through NGINX!
Before continue reading further, you need to acquire a SSL certificate. I’m using a Let’s Encrypt free certificate. Here’s a guide on how to get it for a QNAP NAS.
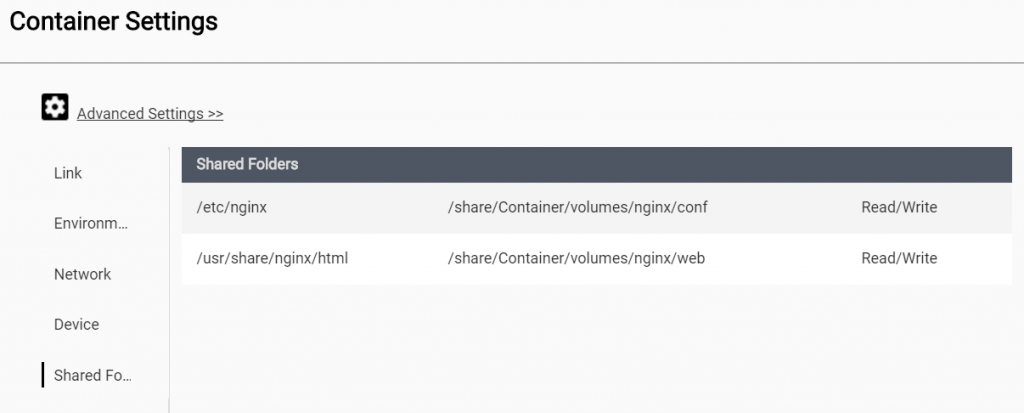
Installing NGINX through docker is easy I used the image simply called NGINX. I mapped the folders “/etc/nginx” and “/usr/share/nginx/html” to local folders:
Picture 7. QNAP Container Station NGINX shared folders mapping.
Configuration of NGINX is done through the file “nginx.conf” located in mapped conf folder. Below is an example of the config parts used by transmission:
This config above assumes you already have generated SSL certificate files in this case named “chained.pem” and “domain.key” and placed them accordingly (in this example “Share/Container/volumes/nginx/conf/certs/…”).
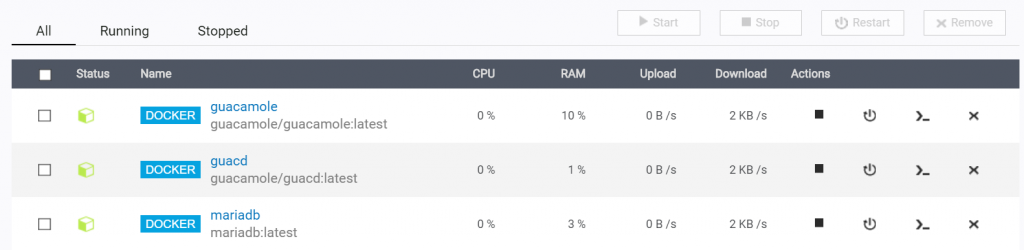
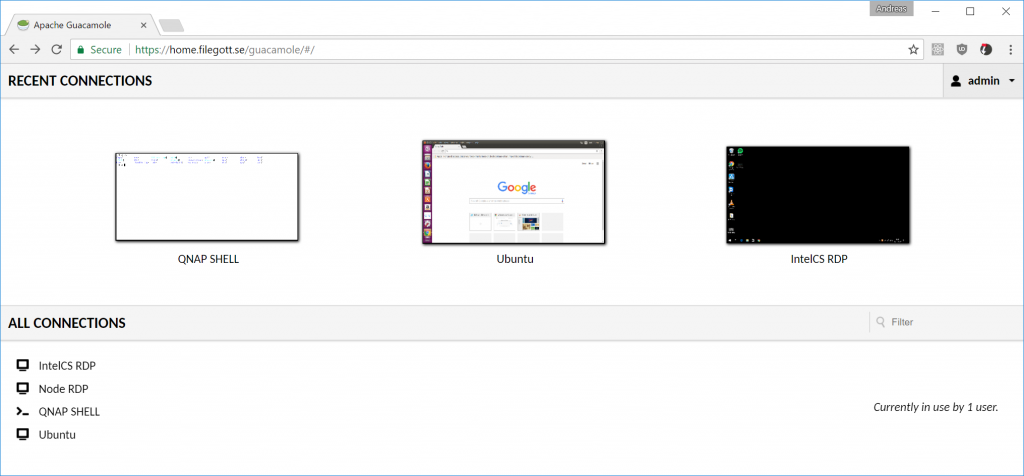
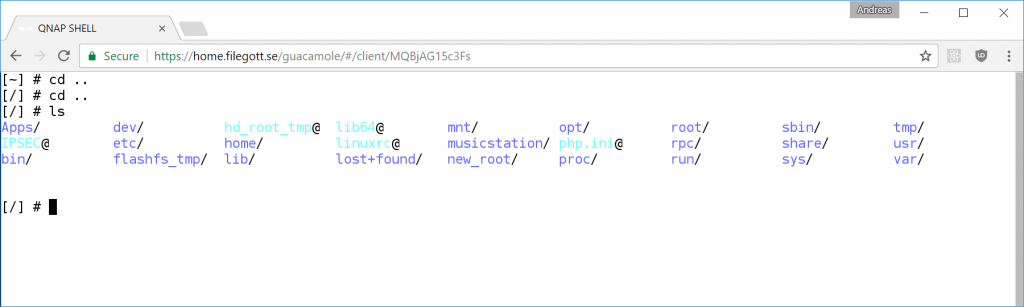
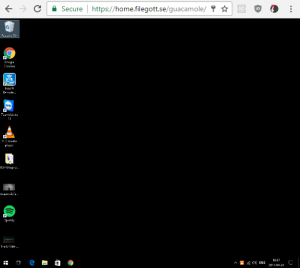
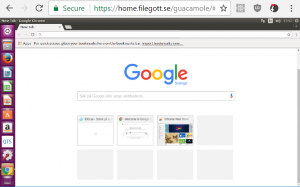
Apache Guacamole is a clientless remote desktop gateway. A web browser is the only requirement for you to be able to connect to your desktops. To set it up, all you need is these three docker images:
I could have used another database container, but I prefer MariaDB and it’s compatible to MySQL. I used the guide “Installing Guacamole with Docker” and it was “almost” all I needed. I therefore don’t feel it’s necessary to write a full guide as the existing one is great. I solved the SSL encryption via NGINX reverse proxy, guide.
Issues I did encounter
The first issues I had was where to find the db schema for creating a new database from scratch. It wasn’t clear to me from the guide. You needed to download the guacamole-auth-jdbc-0.9.12-incubating.tar.gz and unpack it and
in the “\mysql\schema” the files “001-create-schema.sql” and “002-create-admin-user.sql” can be found.
QNAP Container station did not work with container linking when using “Bridge” mode (it assigns a new IP-address), but maybe that is how it should work.
I had an issue after I got everything to working. I added a test (none-working) connection to the default user. Every time i tried to log on with that user it used that broken connection and it got stuck. So if a user only has “ONE” connection that will be automatically used when login in to Guacamole. I just just recreated the DB and made sure I created a test user to experiment with:)
“In computer networks, a reverse proxy is a type of proxy server that retrieves resources on behalf of a client from one or more servers. These resources are then returned to the client like they originated from the proxy server itself”
So why do you want to use a reverse proxy? In my case it’s because I want to hide ports and instead forward request based on domain name. I also want to handle SSL encryption at one place. So even if I have a self signed certificate internally it will still show a green URL if NGINX is setup properly with a SSL CA.
Prerequisites
This config example assumes you have a DNS or DDNS already setup and a existing signed certificate from a CA (chained.pem and domain.key). The ports 80 and 433 on your router also need to forward request to your NGINX instance (in this example running on 192.168.2.1).
What I want to accomplish:
# Setup routing for Nas Management 192.168.1.4 (home.filegott.se)
http://home.filegott.se –(reverse proxy)–> http://192.168.1.4
https://home.filegott.se –(reverse proxy)–> https://192.168.1.4
I had to add three extra lines for support of webSockets for my UniFi Controller. Also worth mentioning is that the certificate used is signed for use of both domains: home.filegott.se and unifi.filegott.se.
I just ended up using Yannik’s Git repository containing a already working shell script. The script uses acme-tiny to get a Certificate from Let’s Encrypt. Follow the instructions, if you’re a Windows user I recommend Putty. The only issue I had with Yannik’s guide was installing Git, see below:
Installing Git on QNAP TS-453A
Getting Git running on my QNAP TS-453a was harder than i thought. I couldn’t find Git anywhere in “App Center”. Eventually I found a git qpkg file (QNAP application Package) that could be installed. I could only get version 2.1.0 working.
Install Git in qnap: Go to qnap “App Center” and press on settings in top right corner. On tab “Install Manually” select “browse…” and upload/install the file above. Done!
This guide if for those that want a domain name for their private server/network but doesn’t have a static IP-address. No worries, this can be accomplished through a Dynamic Domain Name System (DDNS). There are many free suppliers av DDNS but they all work in a similar fashion, below is a guide for using FreeDNS.
Note, If you do have a static IP-address and a hosting provider:
The best thing is probably just to configure a CNAME DNS setting with your hosting provider and point a sub domain to your static IP-address. Example:
Domain
Type
Value
home.filegott.se
CNAME
85.230.180.186
Depending on your hosting provider this can be done differently usually through a GUI.
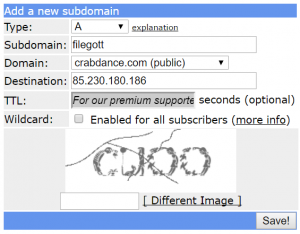
Log in and create a DDNS by pressing “Dynamic DNS” and scroll down and press “[add]”:
Picture 1. FreeDNS add DDNS.
Fill in the fields and press “Save!”. In this example i created the DDNS filegott.crabdance.com.
Update DDNS with a new IP-address. There are many ways of doing this but maybe simplest is using:
http://[USERNAME]:[PASSWORD]@freedns.afraid.org/nic/update?hostname=filgott.crabdance.se&myip=85.230.180.123
Verify through FreeDNS webpage the IP-address got updated.
Setup automated update of IP-address. When doing this we don’t want to use the unencrypted HTTP url above but instead a safer HTTPS url, maybe through curl or Wget. There are example scripts ready to be downloaded from the page: Picture 2. FreeDNS download different update scripts.
Scheduling can be done through Task Scheduler (Windows) or crontab (linux). I actually used my “router” as it already had support for FreeDNS.
Extra credit: CNAME a prettier domain name as DDNS (if you have a hosting provider)
My hosting provider doesn’t provide a DDNS service but they do enable users to create their own sub-domain and link them to other addresses:
Domain
Type
Value
home.filegott.se
CNAME
filegott.crabdance.com
unifi.filegott.se
CNAME
filegott.crabdance.com
So now by using the CNAME the browser will still display home.filegott.se but will be using the DDNS to get the correct IP. As you noticed I even added another domain that points to the same DDNS (IP-Address), why you ask? This is because I have NGINX reverse-proxy listening at filegott.crabdance.com that directs the request differently depending on the domain name used in request url.