Posts

Custom water cooling the Ghost S1

Complete dual rad Ghost S1 water cooling.

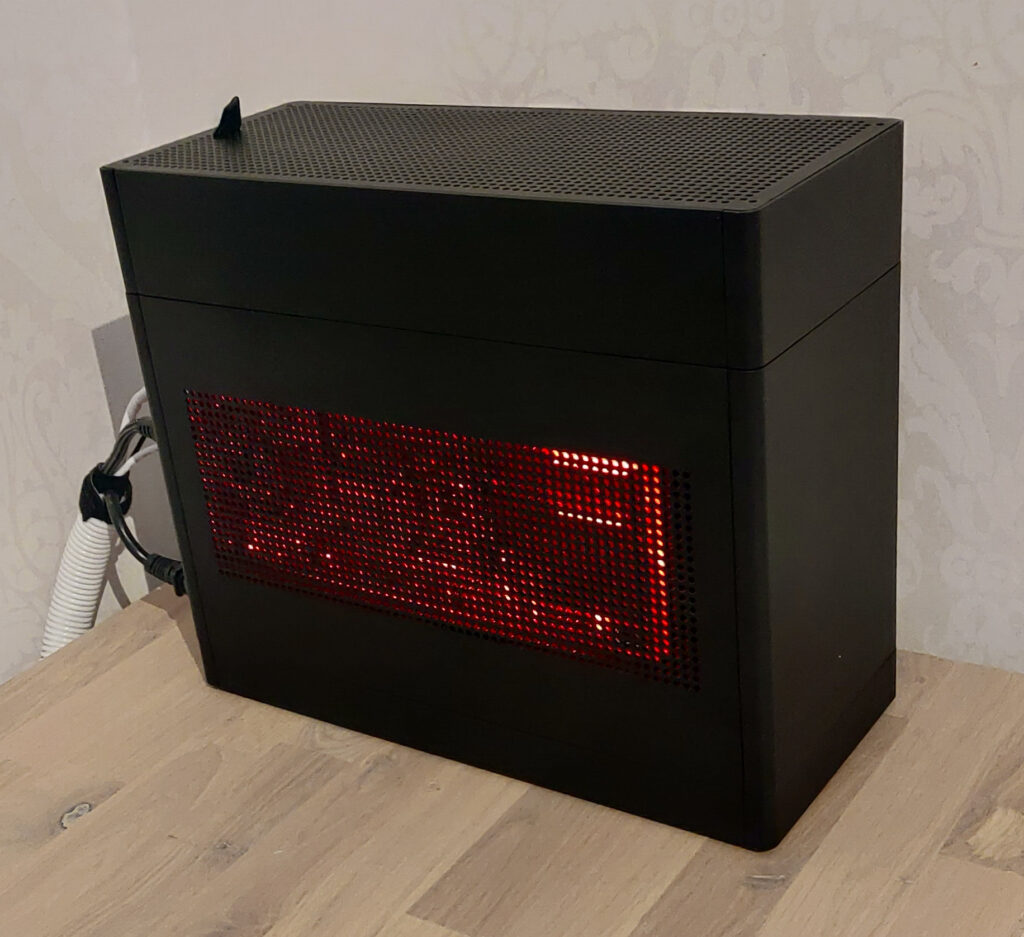
I’ve owned the Ghost S1 case for a few years and I’ve been using normal air cooling (NH-L12). When I bought the case (think it was through Kickstarter), I opted to get the big top-hat as well for future “needs”. I didn’t end up using the top-hat as the setup worked great and the fans only ramped up during gaming (with some noise) but otherwise very quiet.

I recently upgraded my system to a 12 core Ryzen 5900x CPU and a Radeon 6800 GPU. I found it to be a bit too hot but still manageable with air cooling. I did eventually decide to under volt the CPU and lower the max TDP to 110w and I also added a small top-hat with 2 extra fans (Noctua NF-A12x25 PWM). This worked great and most people should stop here as this is an awesome setup.

But working from home (Corona) made me a bit bored and also I had that extra large top-hat that could fit a radiator, so I decided to take the dive into the unknown and build my first custom water cooling.

Decisions

The main thing I wanted to accomplish was a quiet solution during heavy GPU use, so the current CPU cooling actually worked great already, only missing a better GPU cooling. The main problem was fitting a reservoir and pump somewhere. Two obvious viable solutions are available:

  1. Getting a pump CPU block with integrated pump. Options like: “Swiftech Apogee Drive II” (expensive but very powerful) or “Alphacool Eisbaer LT” (weaker but enough for smaller loops)

  2. Get a small enough pump or pump-reservoir-combo to fit somewhere else in the case. One option would be the “Alphacool Eisstation 40 DC-LT” combined with the “Alphacool DC-LT 2”. Pretty much the same pump mentioned above, so a bit underpowered (used by Alphacool’s AIO solutions). If proved too week you could always get the “Alphacool Eisbaer LT” in serial for two pumps in total.

I opted with the second option as the dimensions are so small and I should be able to fit it somewhere. Any GPU block would work, as it should fit (this proved not to be true as I had issues fitting my block). I decided to use soft tubing as it’s easier to use in cramped spaces. I used the somewhat thinner tubing 7.6 mm from Alphacool used by rack servers.

Solution

Custom water cooling components used for my Ghost s1 listed below (first version of case with pci-e gen4 riser bought later):

Case: Ghost S1 (first version) with L and S top-hat.
Pump: Alphacool DC-LT 2 – 2600rpm Ceramic – 12V DC – (3 phase sine wave PCB)
Reservoir: Alphacool Eisstation 40 DC-LT
Fans: Noctua NF-A12x25 PWM (4 of them in total)
Radiators: Alphacool NexXxoS ST30 Full Copper 240mm, Alphacool NexXxoS ST25 Full Copper 120mm radiator
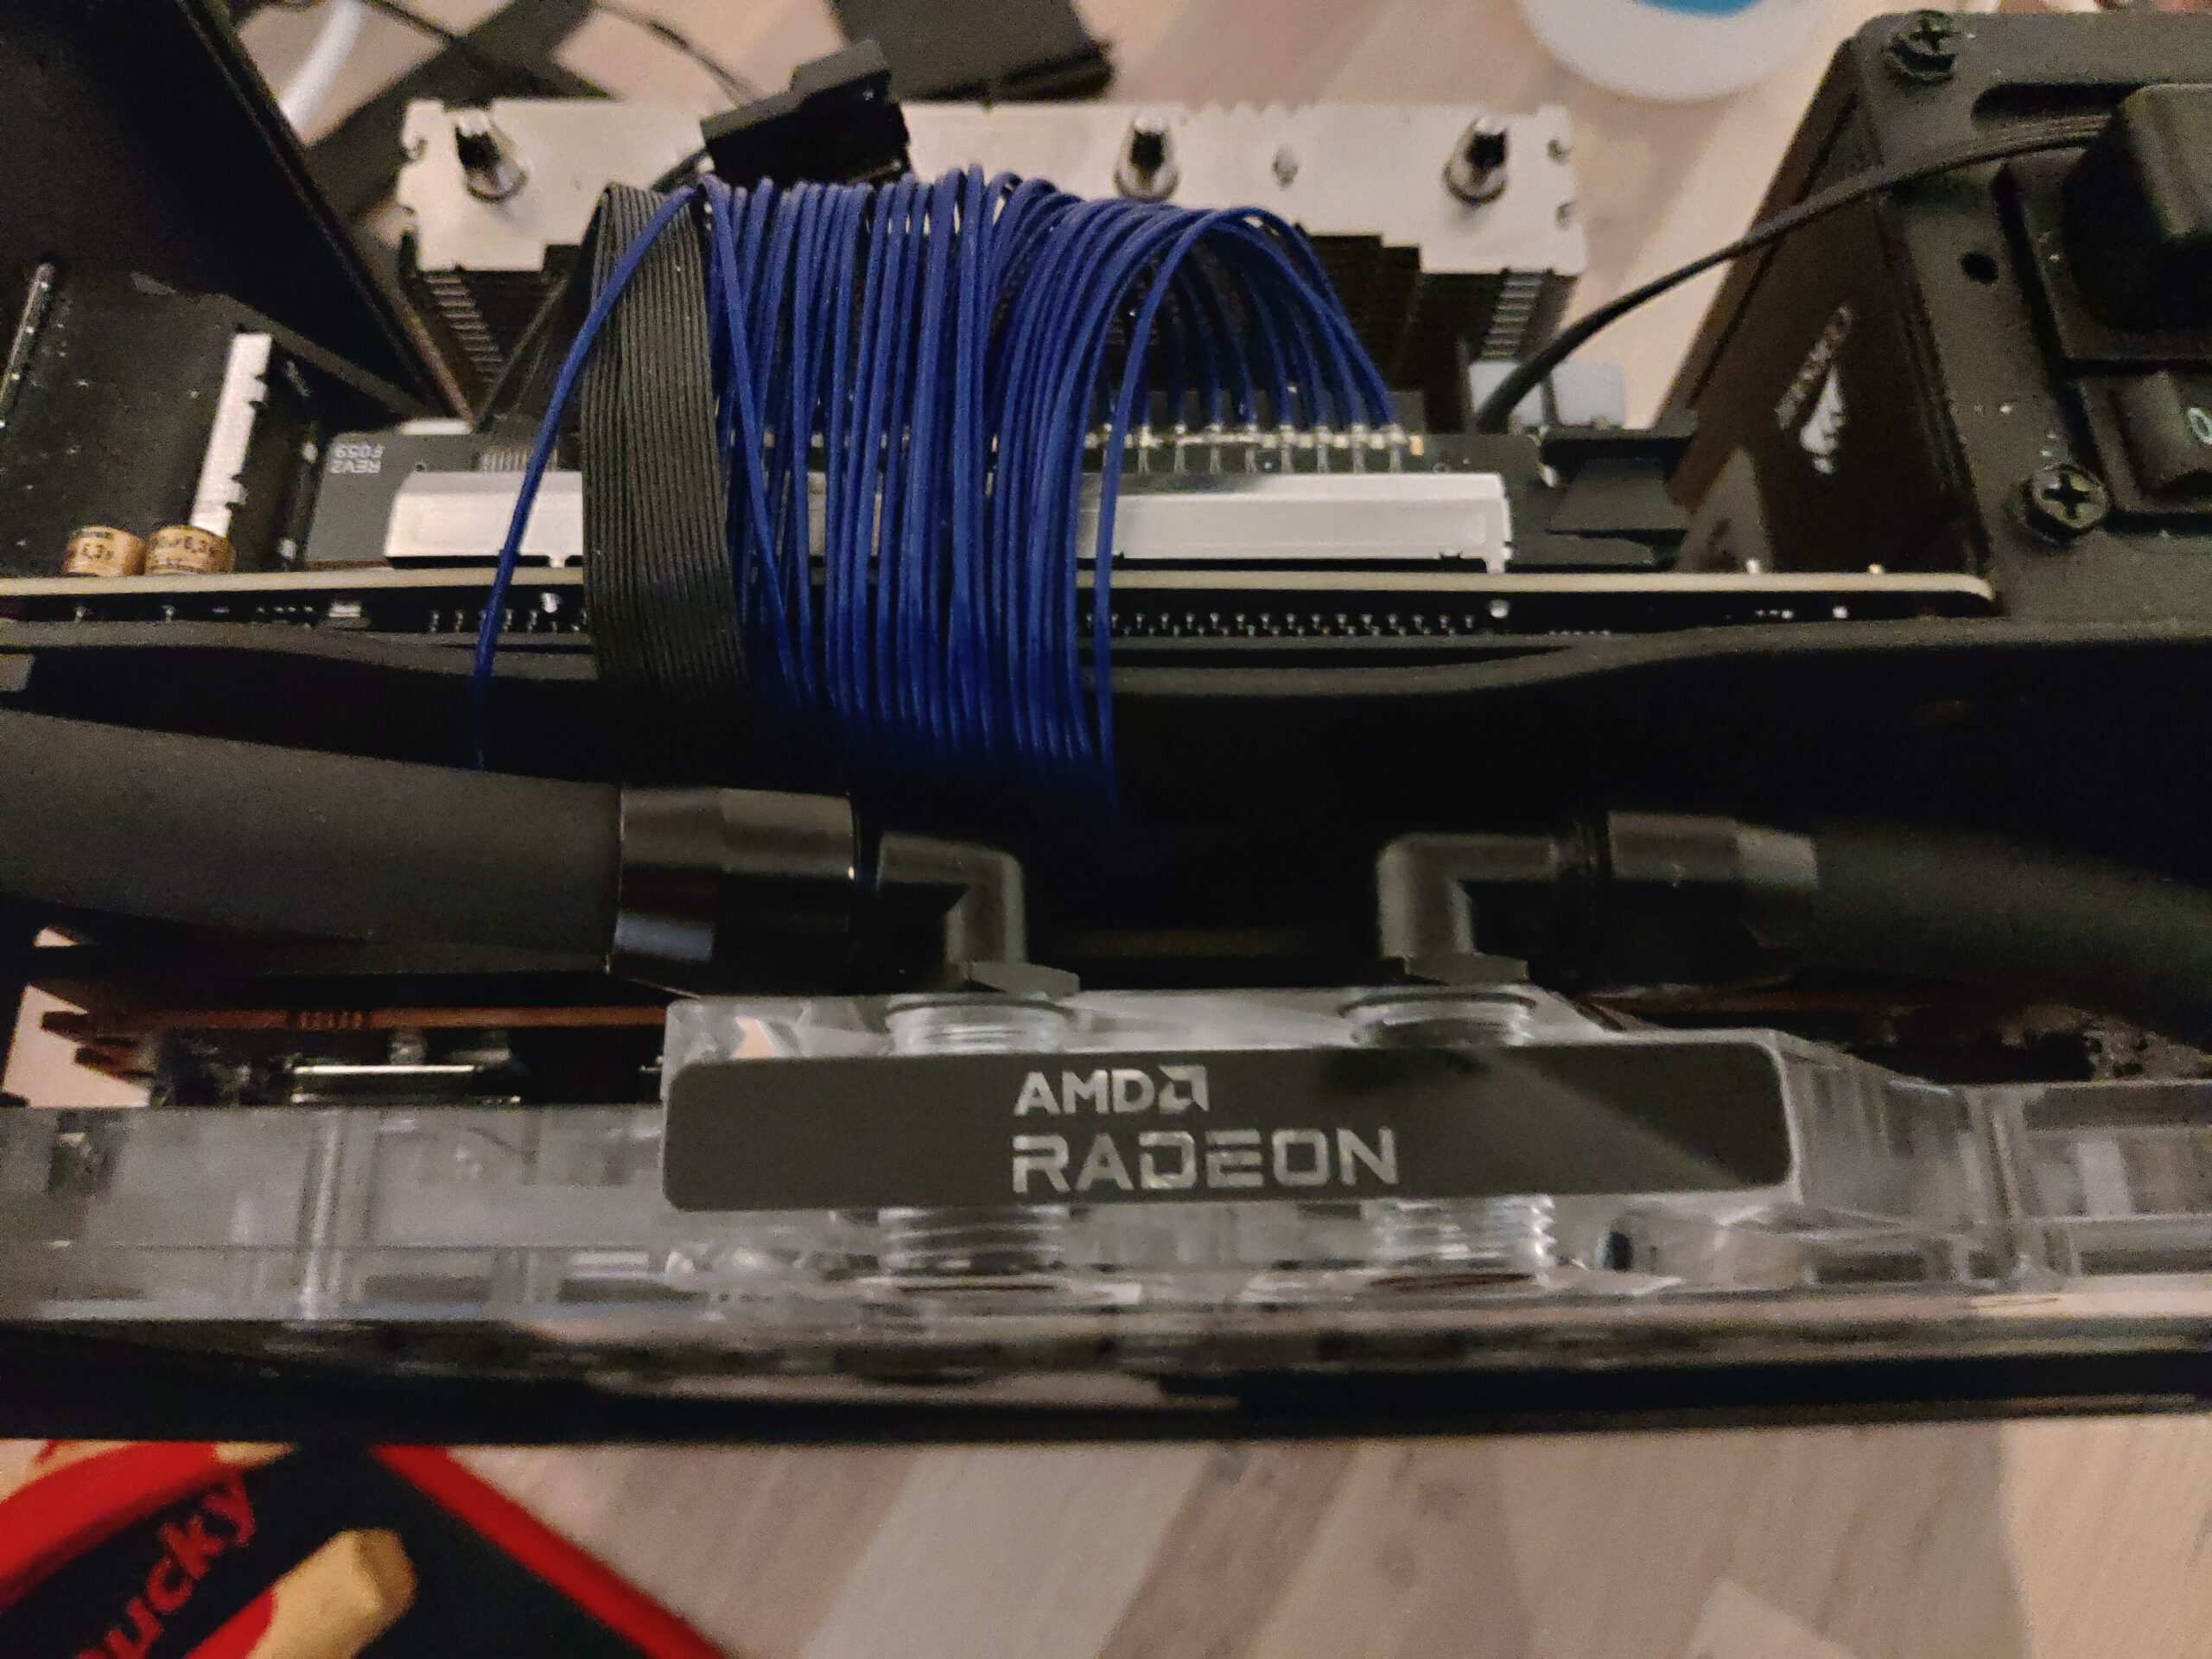
GPU block: Alphacool Eisblock Aurora Acryl GPX-A Radeon RX 6800/6800XT/6900XT Reference with Backplate.
CPU block: Barrow LTYK3A-04 V2 (cheap block with low flow restriction)
Tubing: Alphacool tube AlphaTube TPV 12,7/7,6 – black matte 3,3m
Fittings: Alphacool HF compression fitting TPV Metall – 90° rotatable 12,7/7,6mm – Black, Alphacool HF compression fitting TPV Metall – 12,7/6,7mm Straight – Black

Problems encountered

  1. Haven’t received all the parts needed (~3-4 weeks). My solution is to only water cool the GPU.

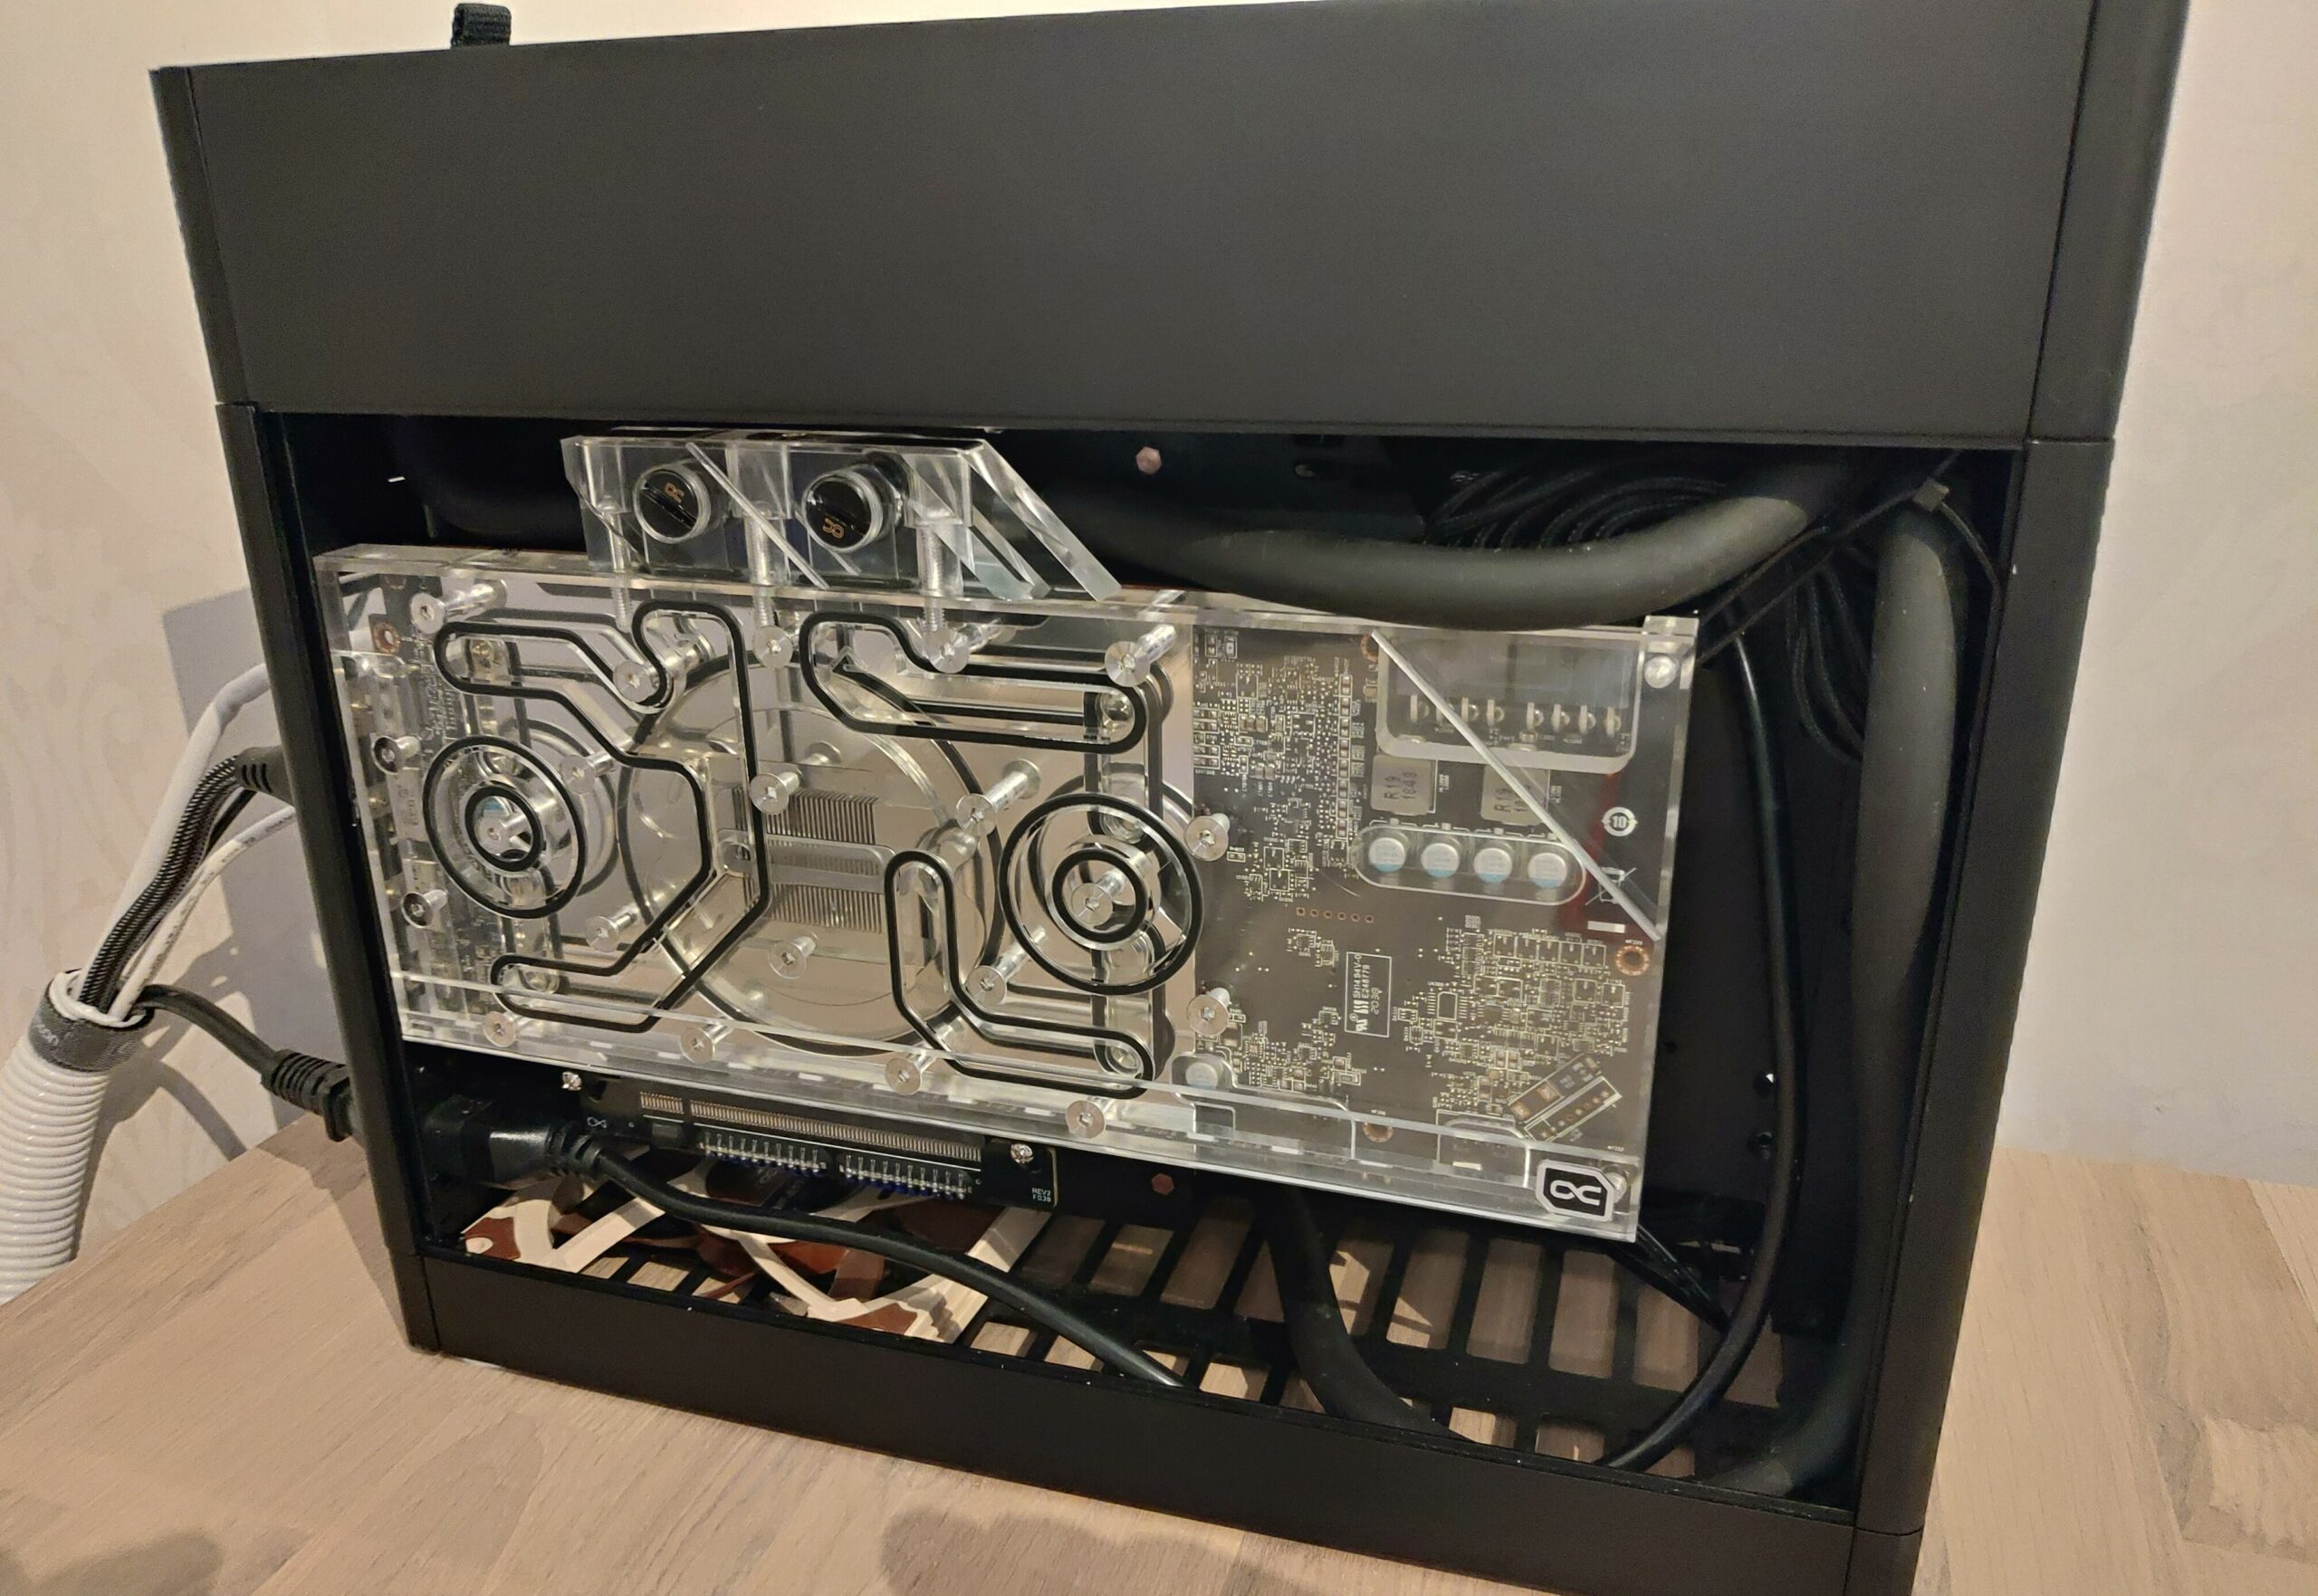
    I will extend the loop with the extra 120mm radiator and the CPU block at an later date when parts have arrived.

  2. The GPU water block form Alphacool was too thick even with only 19mm high 90° fittings, I could not close the case. The block was also too high (~2-3mm), interfered with top-hat. Easiest solution would be to get another GPU block (EKWB got some nice ones). I modified the Ghost PCI-e riser mounting and added another IO-plate to my GPU. I could then placed the fittings on the inside of the GPU without any issues. This allowed me to move the GPU almost flat against the side wall of the case as well and lower the GPU about 5mm so it wouldn’t interfere with the fan and radiator

    I could then place the GPU fittings on the inside without any issues.

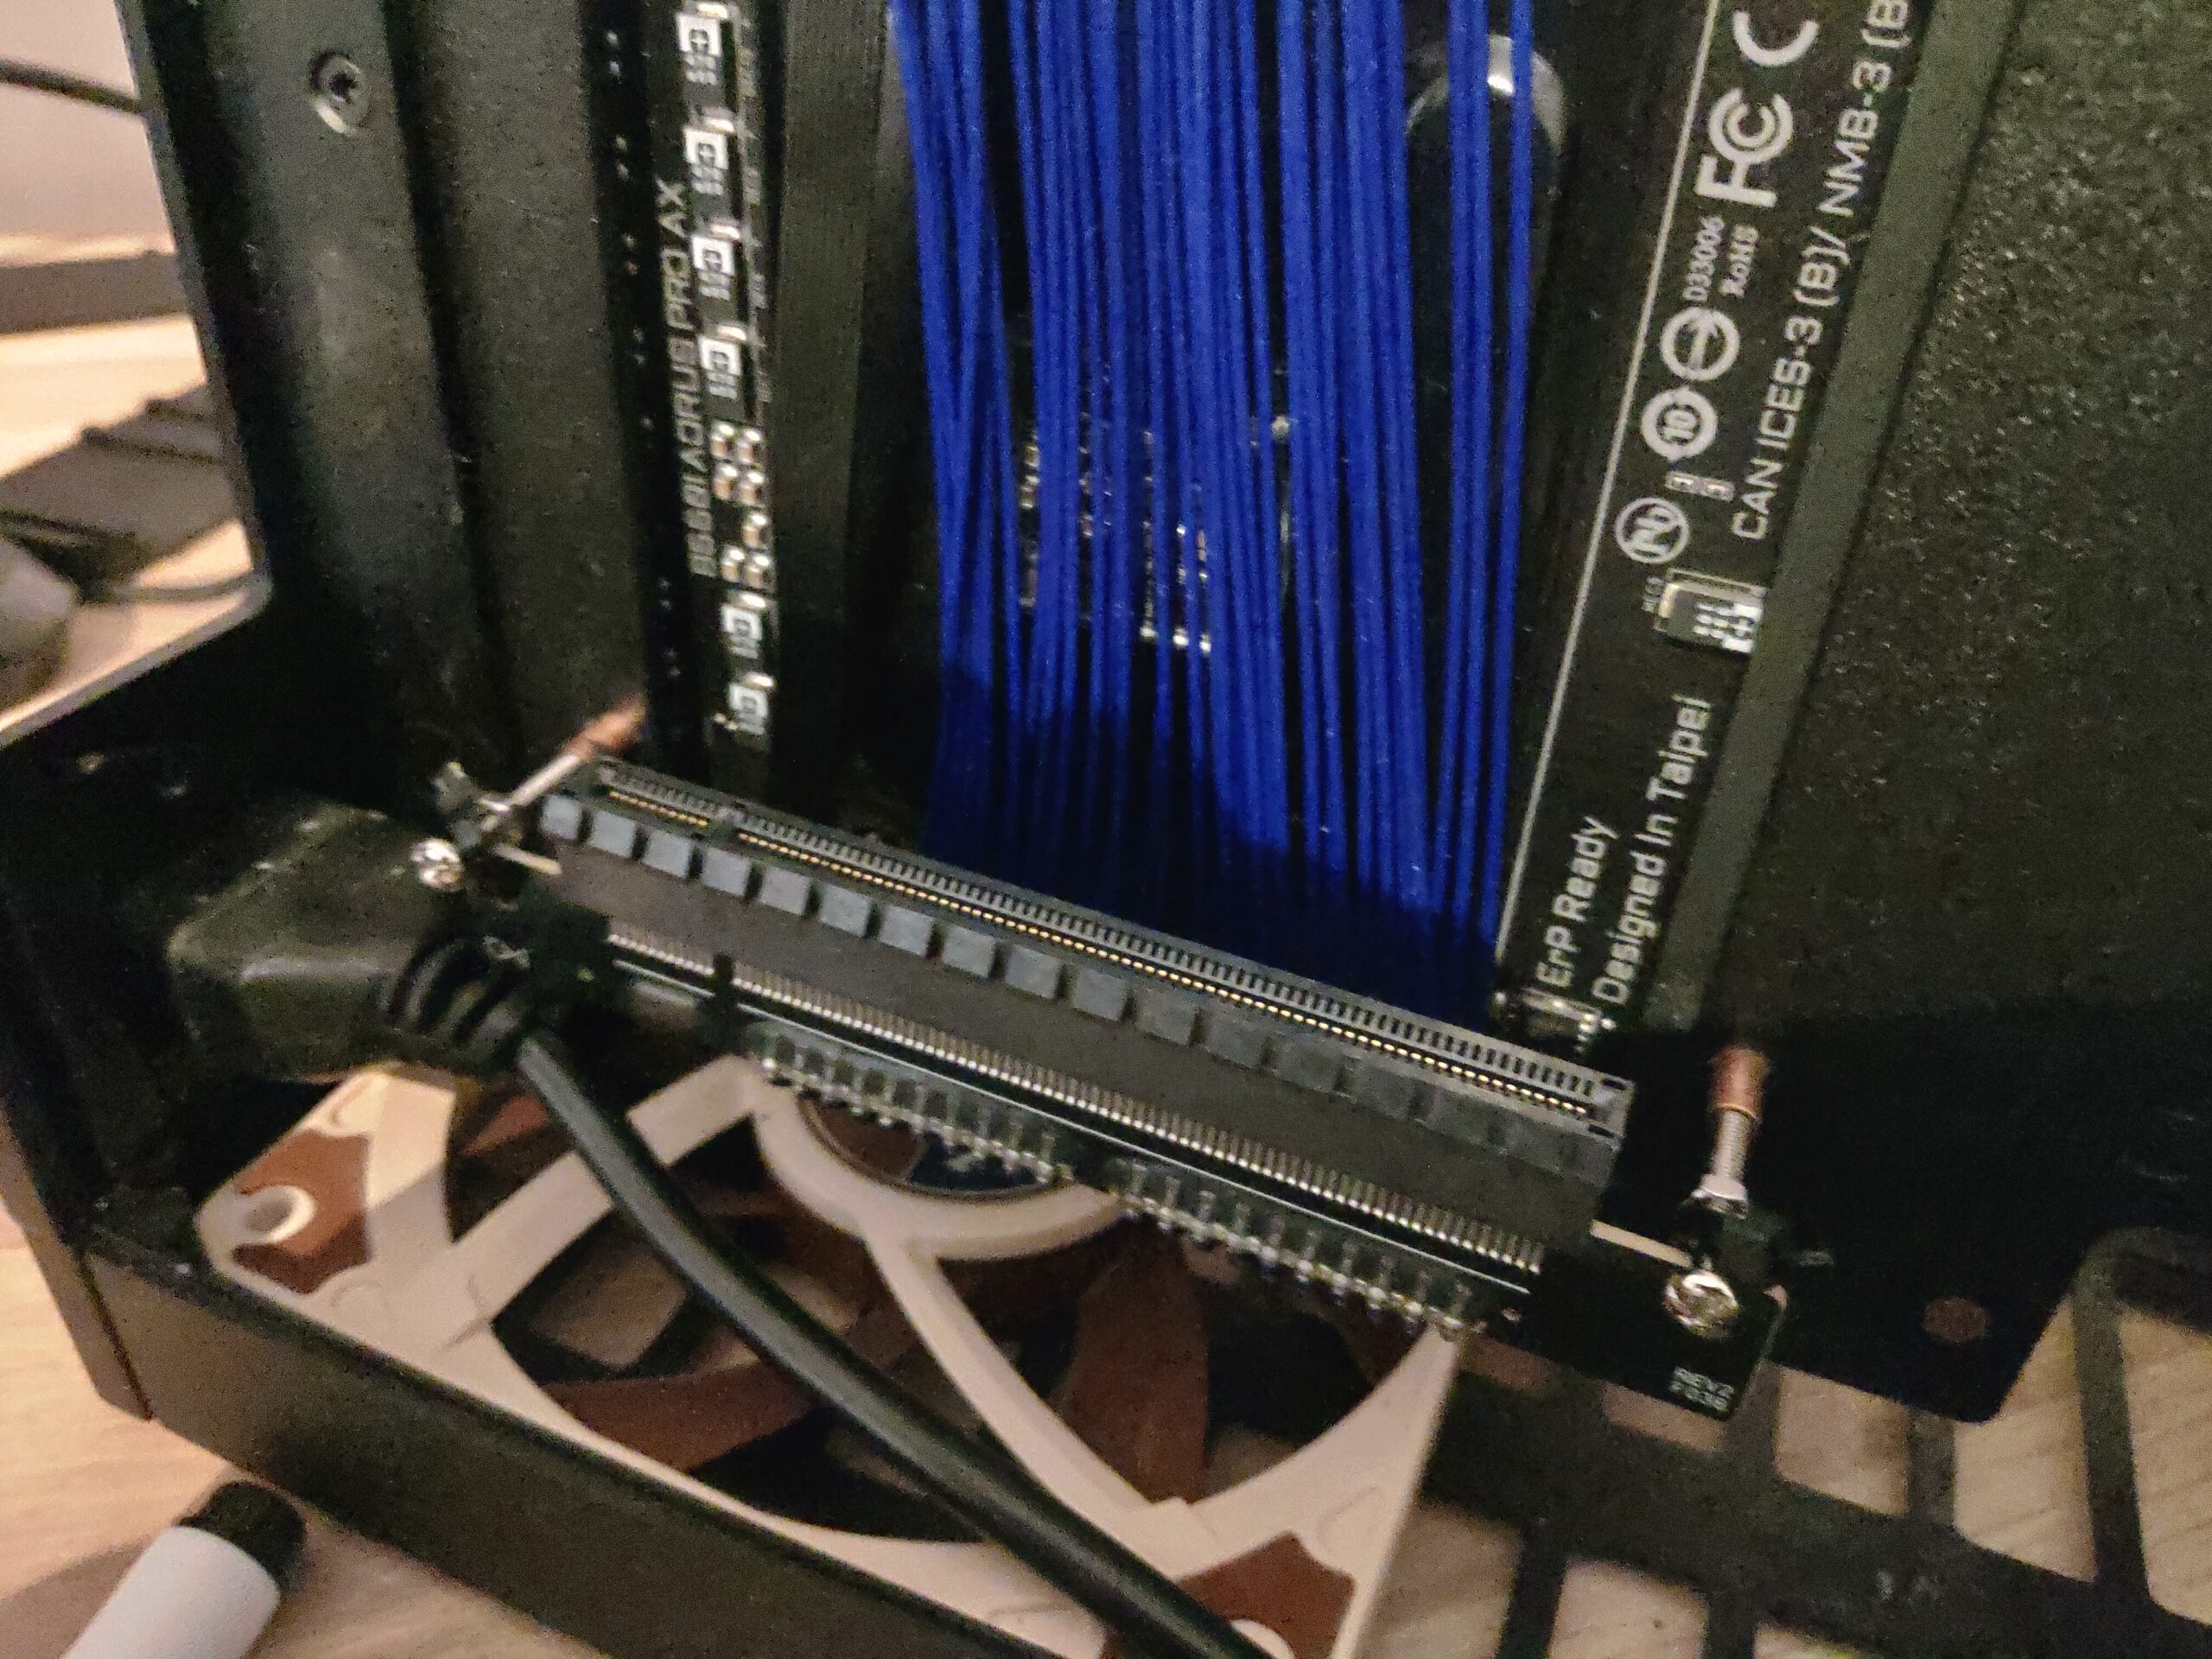
    Yes, not my best modification, used zip ties and extra long screws:) Maybe I will change this, but it works ok for now. The riser mounting also pushes against the main power inlet but it’s fine. I believe the later versions of Ghost S1 mounts the GPU a bit lower so this lowering is not needed then.

    New IO-plate for GPU worked great, and no need to actually modify case or GPU permanently. I just took an old IO-plate I had laying around and drilled 4 holes in it (kept the old one if ever needed). Now (2021-03-30) another flat GPU terminal for my water block is available to buy from Alphacool (~15€), so my modification above is not be needed if you buy that extra terminal.

  3. Pump and reservoir combo did not fit behind the GPU as first planned, my Radeon 6800 is too long. Solution was to place the pump reservoir combo in top-hat, fit perfectly next to the radiator.


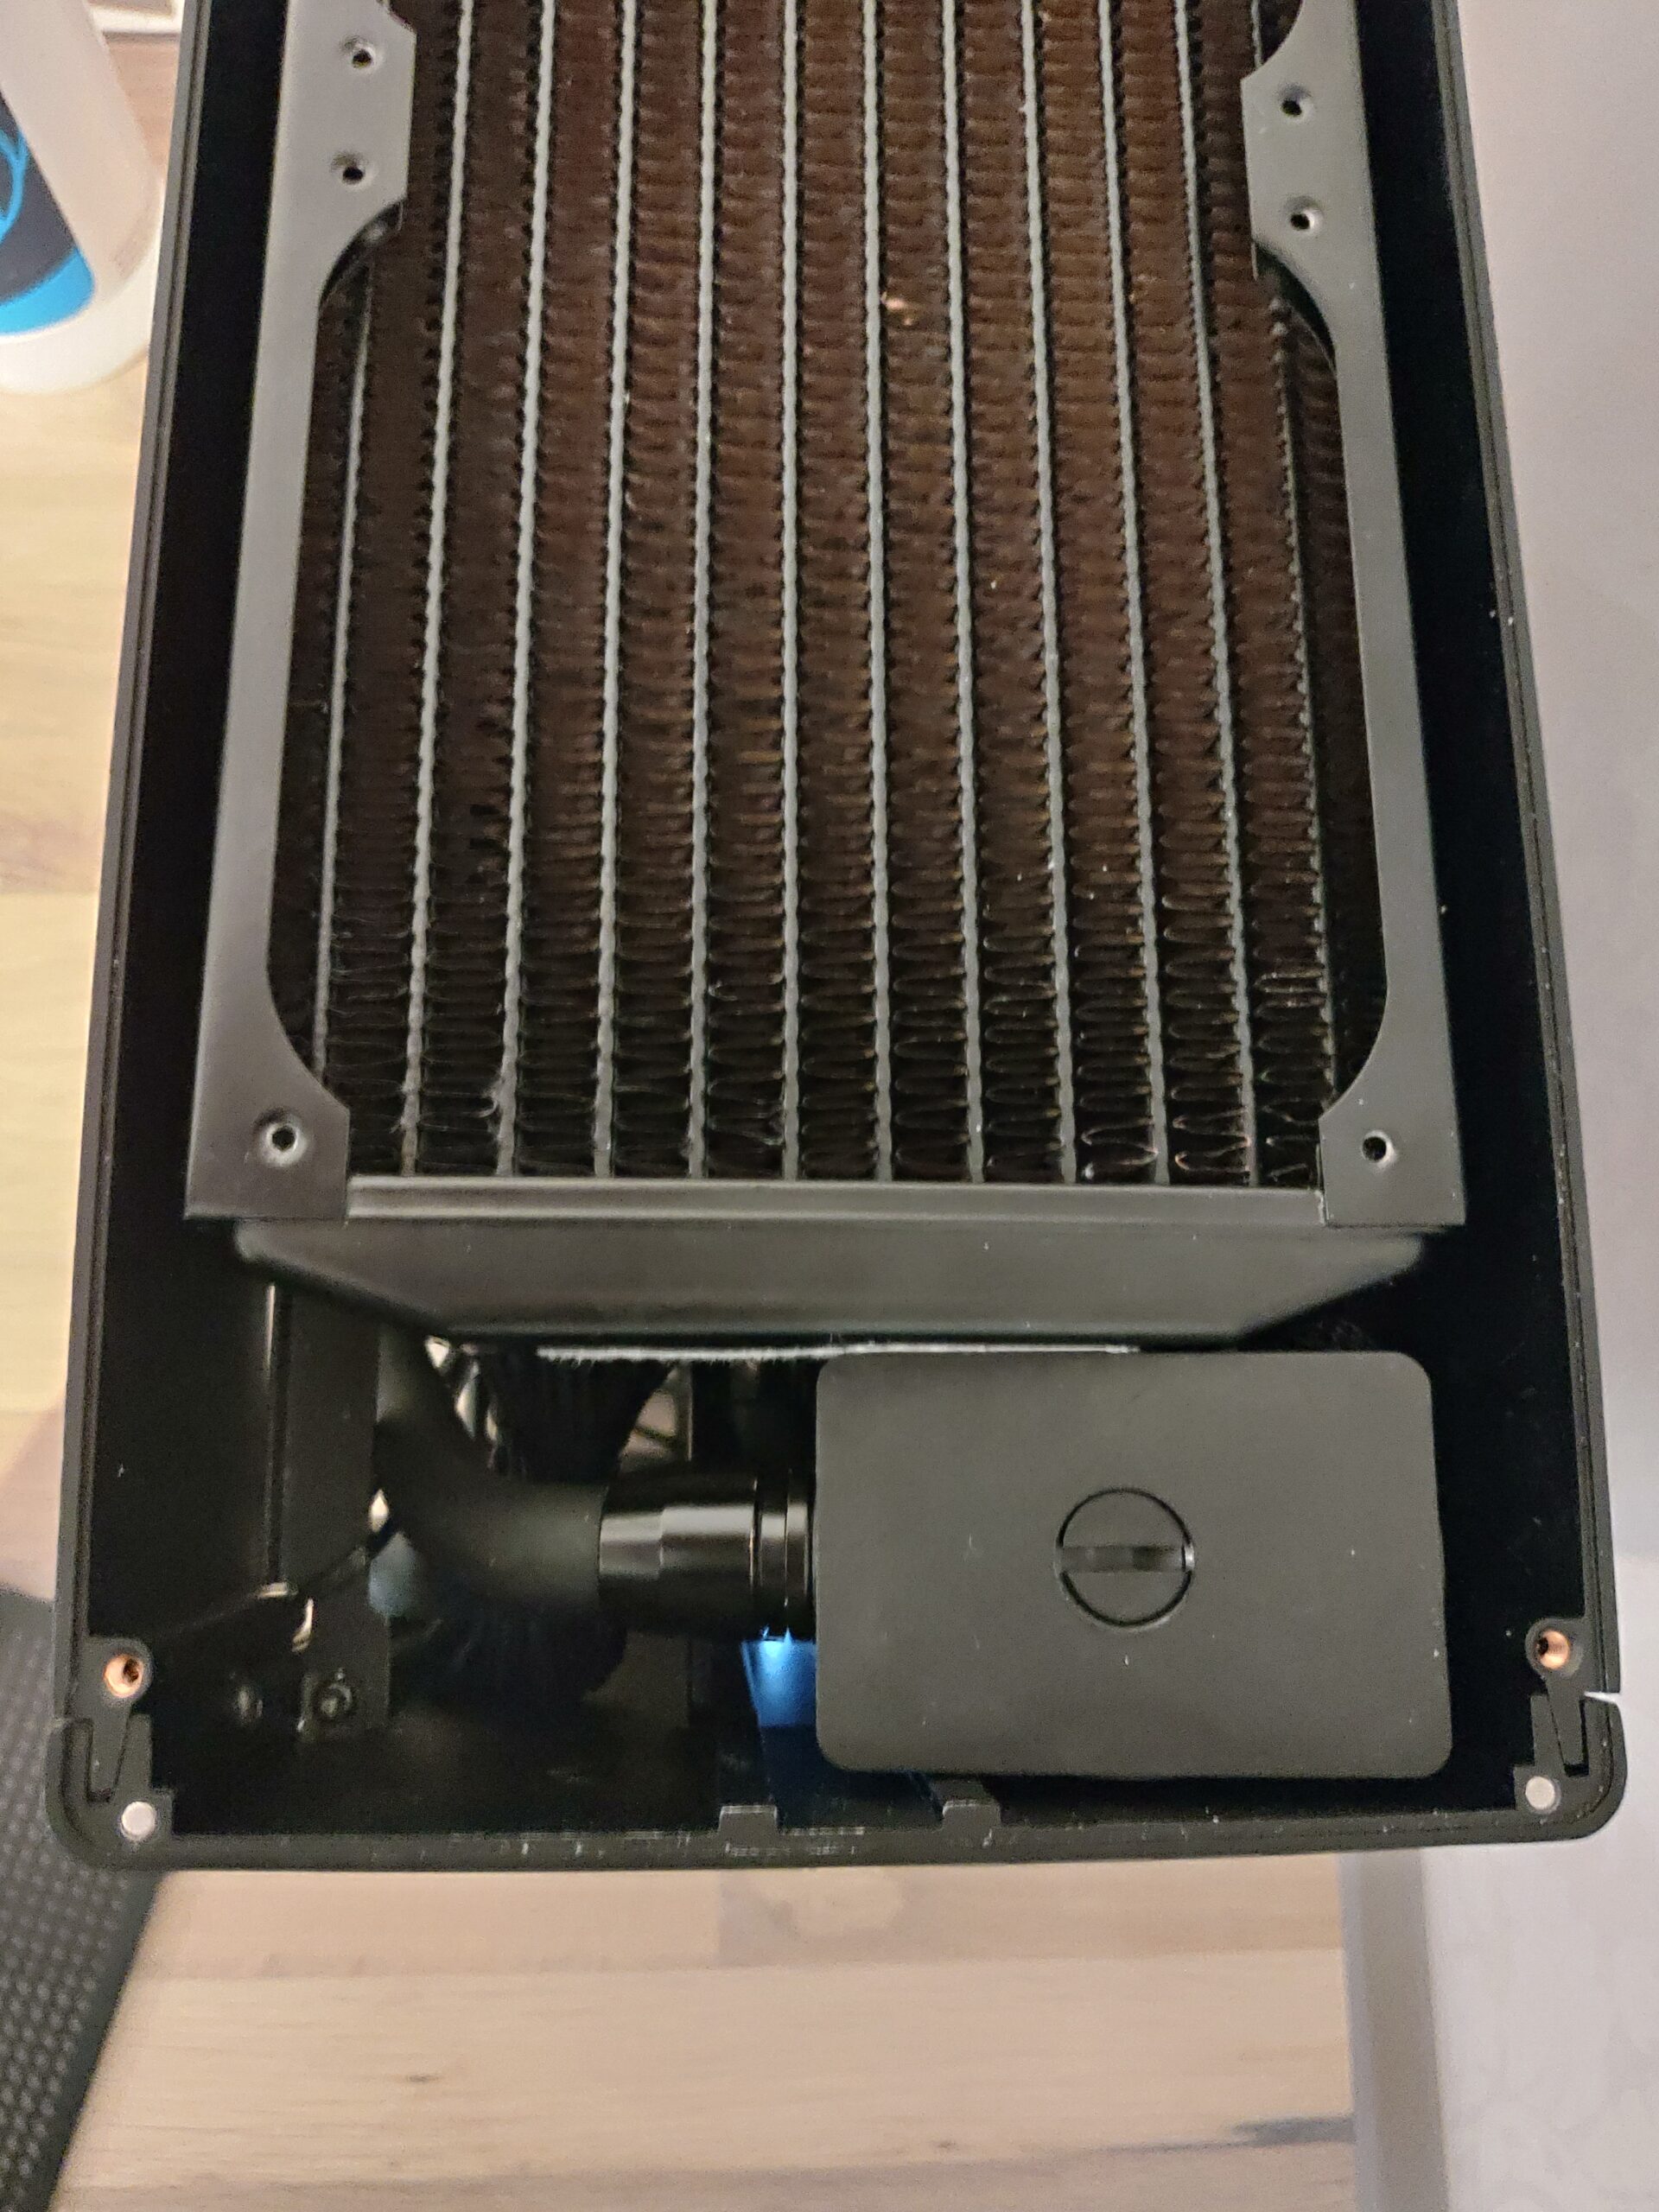
  4. I managed to “lose” the cables attached to the pump when I was messing around with the case. Solution was to just order a new pump (30€) as trying to open the pump without damage it and solder the disconnected cables proved to difficult for me. Be careful when handling the Alphacool pump and don’t jerk the connections to it!

Conclusion

The solution is temporary and only the GPU is water cooled, so still using the NH-L12 for cooling the CPU, waiting for all the parts to complete the full loop. But works awesome like this too. It will be interesting to see the thermals with a complete loop CPU, GPU and 2 radiators (240 and 120mm).

It’s now a larger case than before because the use of large and small top-hat, but it’s still very small and quiet when compered to other solutions. The NCASE M1 case is an option as well (cheaper if you don’t own the Ghost S1 already) but I really like the Ghost S1 case. Very pleased with my current setup and probably even better when the full loop is complete.

I will put side covers back when loop is complete, I like minimalistic solutions.

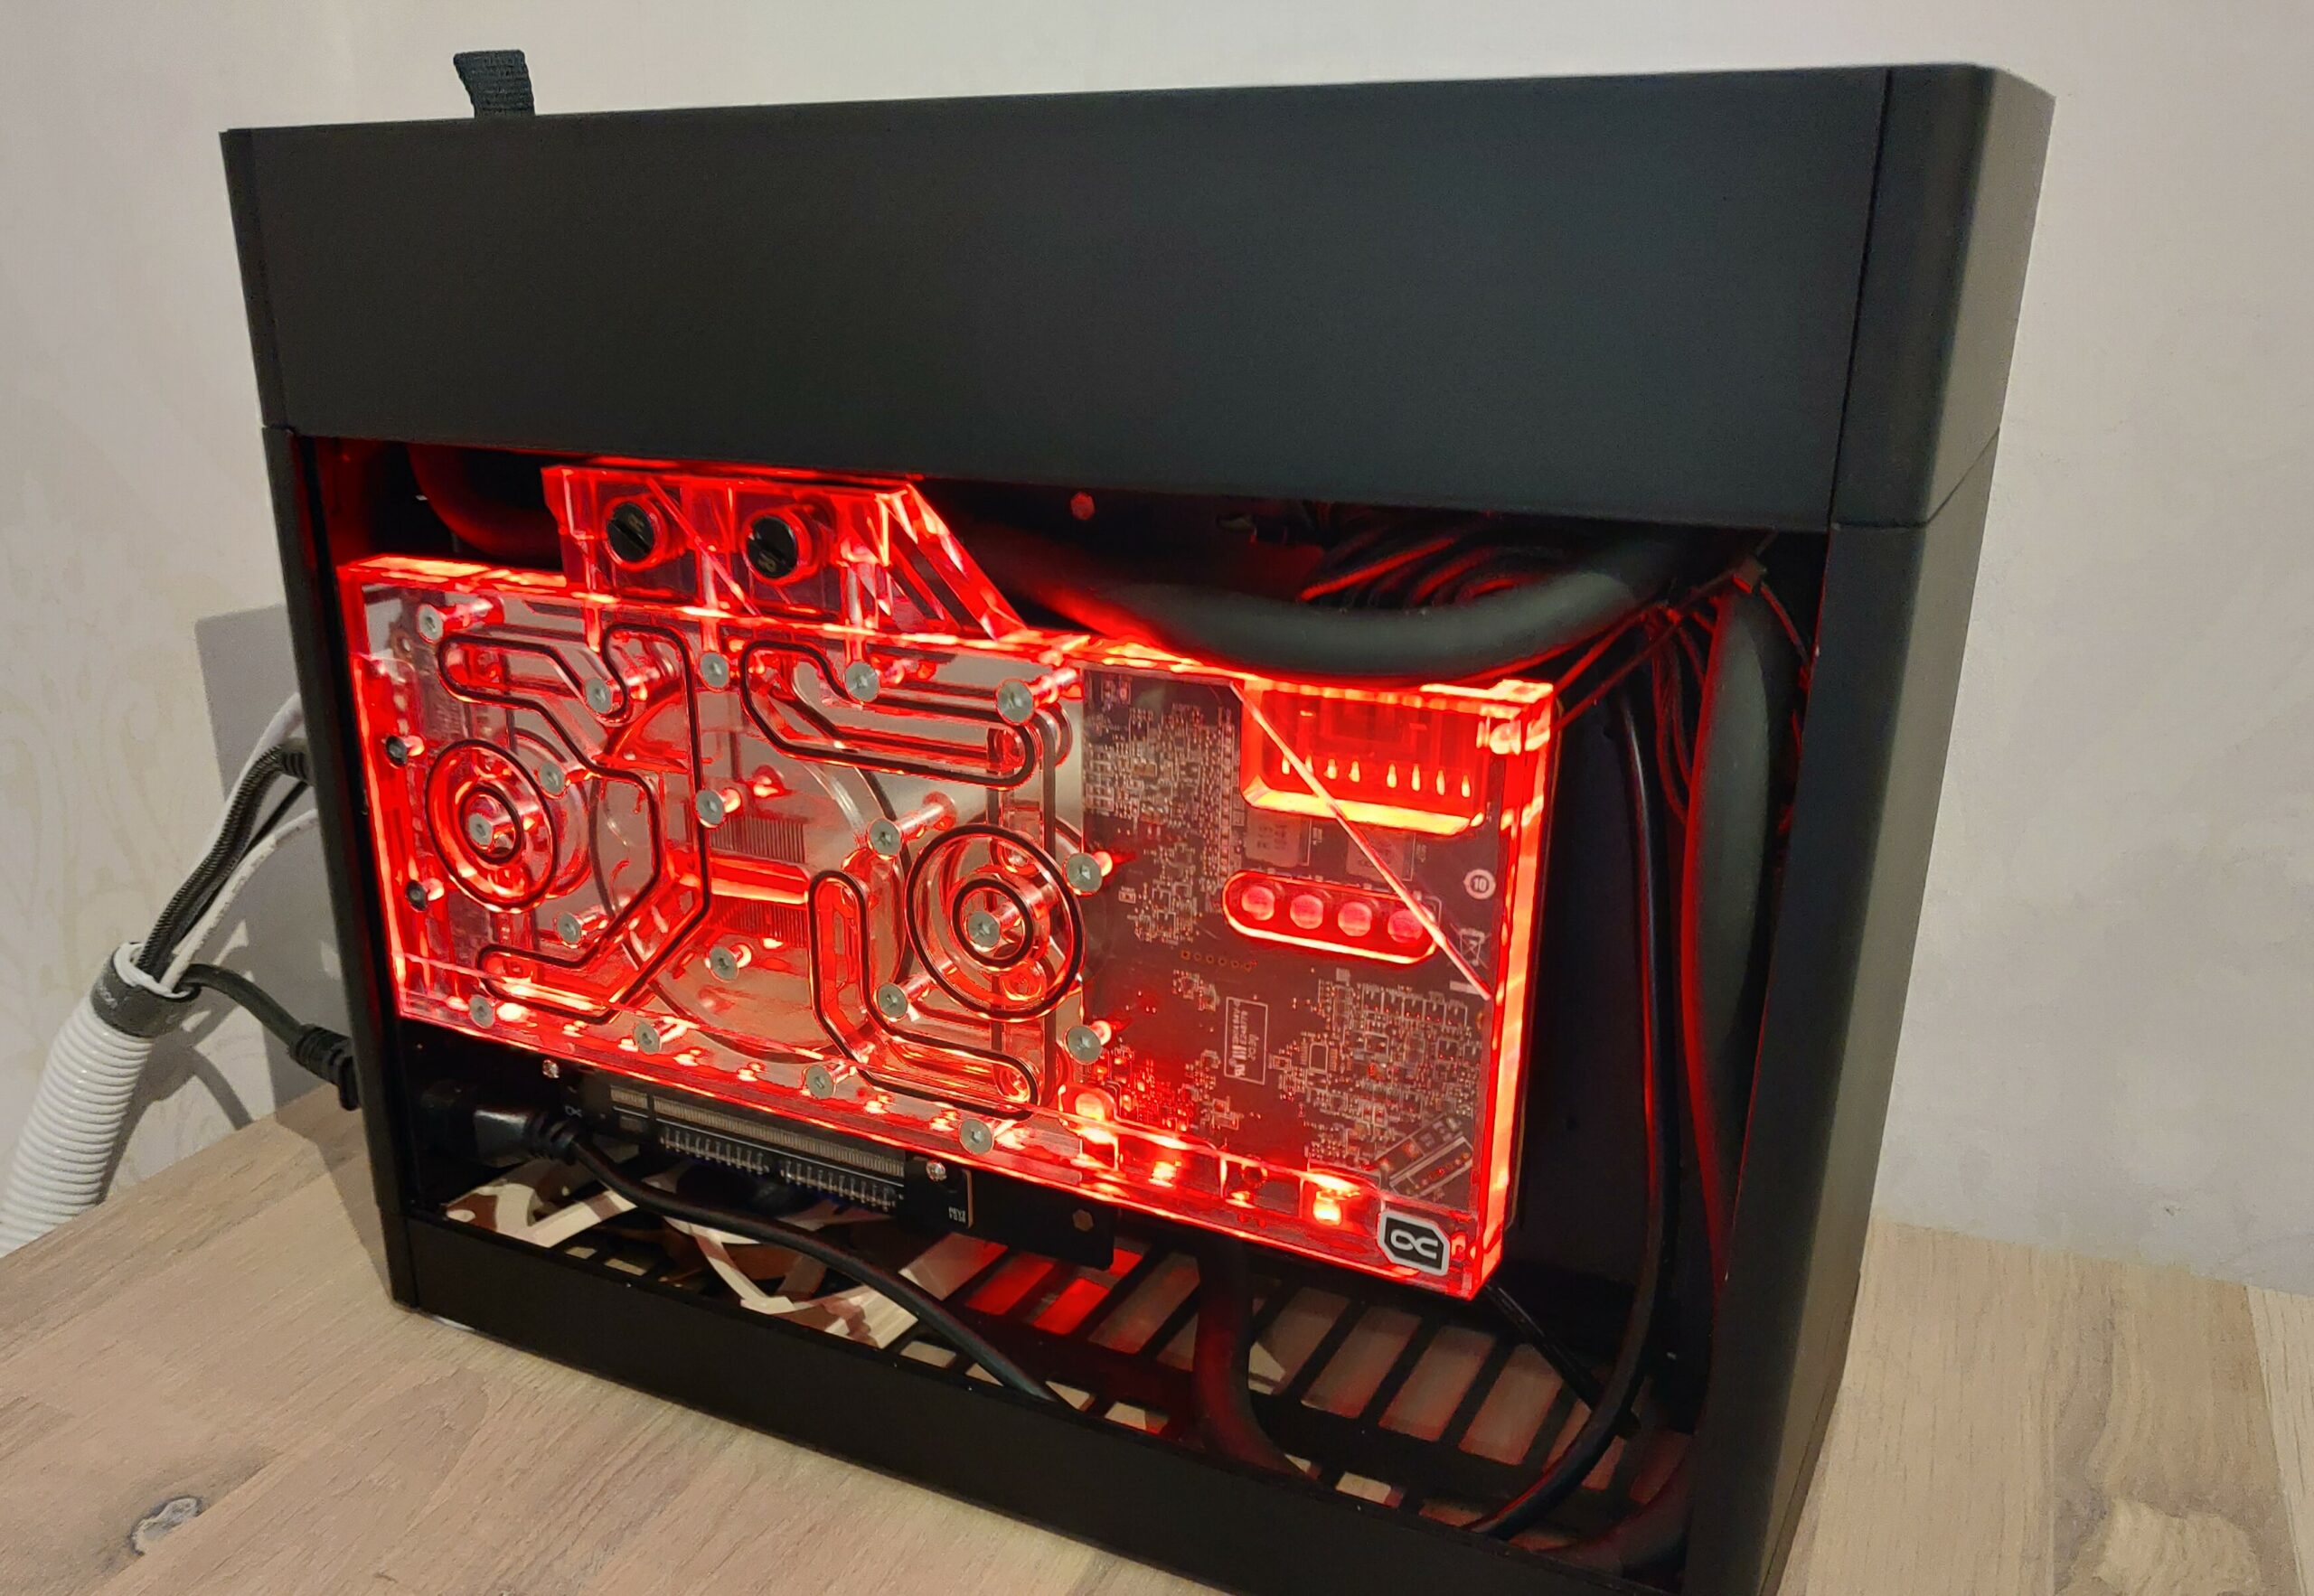
I added another zip tie at the corner of the GPU to stabilize the GPU a bit more because of the PCIe riser mounting modification I did.

Update (2021-04-16): Got all the parts and have now completed the loop and it works great 🙂

Right side of case where Barrow CPU block can be seen through the side panel.

When doing some Ethereum crypto-mining the GPU temperature is about 50 degrees Celsius without a fan-grill (fans spinning around ~950 rpms). Temperatures goes up to 55 degrees Celsius when fan grill is on!. I’ve read that putting the fans in a pull configuration just next to the fan-grill might fix this issue. so I might try this at an later date.

I’m not a miner, I’m just putting the GPU to use when possible so I can get some extra cash for my hobby projects.

Home automation (control my home lights etc.)

I wanted to keep my existing lights but add the ability to control them in a smart way (internet/automations etc). To accomplish this my existing switches/dimmers needed to be exchanged for smarter versions. After some reading/investigation I came to the conclusion that the solution must also support Home Assistant, the leading (open source) software to connect everything together.

There are a few different wireless techniques that are interesting: 433 MHz (Nexa), Z-Wave (Fibaro, Qubino), ZigBee (IKEA, Xiaomi), Bluetooth, BLE – Bluetooth Low Energy (Plejd) and WiFi. There are so many different brands that all use different techniques.

Switch/dimmer

The two brands that stood out were Fibaro and Plejd (as I live in Sweden and it is a Swedish company). Plejd uses a newer technique BLE that consumes less power (0.3w) but unfortunately doesn’t have many supported devices compared to Fibaro Z-wave (0.6w). At the time (last year 2018), Plejd had no integration with Home Assistant so that made my choice easier. Fibaro was the clear winner!

(Plejd now has a working integration with Home Assistant so Plejd might be a better choice today if you want less power consumption and don’t mind experimenting a bit more)

Hub/Controller

To be able to control your z-wave devices through the internet a hub/controller is needed. As Z-Wave is used by multiple brands there are many to choose from like: Samsung SmartThings, Telldus Tellstick Znet Lite, Fibaro Home Center 2, Homey etc. I already owned an older TellStick ZNet Lite V1 controller that Home assistant can do a local API integration with.

Problems I encountered with my Fibaro installation:

  • There is no electric “zero” blue wire behind some wall switches. Solution was to use a Fibaro Dimmer 2 as it doesn’t need a zero even though I won’t use the dim functionality.
  • When using “Association” between Fibaro devices sometimes first button press didn’t work (it was like it needed to wake up from sleep first). The problem was that I had forgot to create a two-way Association so the devices states didn’t get synchronised. Works great now!

Home Assistant

The reason you want Home Assistant is the possibility to bind everything else (not only lights) together with one software (instead of being stuck with the Z-wave controller software). I have integrated Google Assistant for voice activation, Xiaomi Roborock vacuum cleaner, Logitech Harmony remote, chrome-cast, wifi network (Ubiquity Unify), security camera etc. Everything can be controlled through Home Assistant!

Here is picture on my Home Assistant first page mobile view (1st floor with clickable light icons etc):

My Home Assistant instance currently runs through docker located on my NAS. I might experiment with a Hass.io installation on my Raspberry Pi later on.

Qnap Linux Station: How to log in with VNC to your Ubuntu instance.

Great guide here with more thorough information (I “borrowed” the script below from this page):

How it works

The VNC Password is stored in the folder “/tmp/.qnap/vncpassword” on your running Ubuntu instance. In the terminal on your Ubuntu instance you can view the temporary password by running the command:

sudo more /tmp/.qnap/vncpassword

Note that the Password changes when you restart Linux Station or the Ubuntu instance.

How to change to a permanent VNC password

Create the file setmyvncpassword.service on the Ubuntu instance:

sudo nano /etc/systemd/user/setmyvncpassword.service

Add file content:

[Unit]
Description=set my password for vnc
Before=x11vnc.service
[Service]
ExecStartPre=/bin/mkdir -m 0700 -p /tmp/.qnap
ExecStartPre=/bin/bash -c "echo MY_PASSWORD > /tmp/.qnap/vncpassword"
ExecStart=/bin/true
Type=oneshot
RemainAfterExit=yes
[Install]
WantedBy=multi-user.target

Exchange “MY_PASSWORD” for your own private password. Use CTRL+X to exit and then type “Y”+ Enter to save.

To enable script on boot type the command:

sudo systemctl enable /etc/systemd/user/setmyvncpassword.service

Upgrading memory on QNAP TS-453A NAS

I wanted to upgrade my memory for my QNAP TS-453A. I really only needed 8 GB (maximum supported) but I found out that people had squeezed in 16 GB without any issues… challenge accepted:)

Picture 1. QNAP TS-453A

The QNAP TS-453A should support most DDR3L memory modules. The trailing “L” is very important and stands for low voltage (1.35 V instead of 1.5 V). So I acquired a matching pair of compatible memory modules (Corsair Vengeance 16GB (2x8GB) / DDR3L / CL9 / 1600MHz / CMSX16GX3M2B1600C9).

Picture 2. Corsair Vengeance 16GB

The video here demonstrates the very simple physical procedure of opening up the enclosure and swapping the memory modules (only 3 screws!).

Picture 3. QNAP TS-453A, New memory modules in place.

I did exactly as in the video and swapped both memory modules, booted up the NAS and behold it worked flawlessly:

Picture 3. QNAP System status, displaying 16 GB!

Conclusion

Officially the QNAP TS-453A does not support 16 GB of RAM, but it does work without any issues as the system status picture above shows.

Now for next question, what should I use all that memory for…


QNAP X86 (TS-453a) Transmission setup through Docker

I tried to find a QNAP Download Station client (chrome plugin) but I couldn’t. Though Download Station is great, I think it’s simpler to right click on a link and do a selection instead of copy and pasting a URL to a web interface.  There’s a great substitute though, Transmission:

Picture 1. Chrome Transmission plugin right click menu drop-down.

Picture 2. Transmission Client GUI.

The pictures above is actually from the chrome extension Transmission easy client which I prefer, there are other great transmission clients as well (even great ones for your phone). This client I actually got to work with SSL encryption through a NGINX reverse proxy, more on that later.

Install Transmission (server) through docker

I actually once had transmission installed locally on my QNAP NAS, but a QNAP update made it stop working and i couldn’t find it in the QNAP app-store anymore. That’s no biggie as I find it better running most things in docker containers. I used the docker image linuxserver/transmission but there are many other great similar containers.

The only thing you need to think about concerning settings are the volumes (shared folders) settings. I mapped the following Docker container folders “/config”, “/download” and “/watch” to local folders on my NAS, see below:

Picture 3. Transmission Docker shared folders settings.

I don’t use the “/watch” folder today, but maybe I want to use it later on.

Tip: I once created the local NAS folder “/share/Container/volumes” to put all my mapped docker volumes in. This is because I too many times accidentally removed containers and by so deleting configs etc.

Now press “create” wait until container starts, hurrah!

Configure Transmission (server)

In the local folder you mapped “/config” to you will find the file settings.json. Edit this file and change field “rpc-password” and “rpc-username” to something else. Restart the transmission docker container, at startup transmission will detect the new none encrypted password and will automatically encrypt for you. If you edit the settings file again the password row will now display a something like “rpc-password”: “{a0a67ed23dfae8d511837326f938567ce86a9b074Qn2t/Hr” (encrypted version of your password).

Go to transmission web GUI, I had setup the Transmission container to use it’s own IP-address, so my URL was: http://192.168.2.3:9091 (default port is 9091).

Picture 4. Transmission server web GUI.

There you go, done!

Setup Transmission easy client extension for Chrome

Install the Chrome extension Transmission easy client (there are a great client apps for phones too). Right click and select options, change the settings and press “Check the settings” to verify, done!

Picture 5. transmission easy client setup.


Extra credit: Add SSL encryption to Transmisson 

If you want to connect to your transmission server from other places than your local home network, I strongly encourage you to use SSL encryption so the password is not sent open over the internet. There are many options on how to accomplish this, you could choose another Docker container with better support for SSL or as in my case use NGINX as a reverse proxy server in front of the Transmission server.

Picture 6.Transmission GUI with SSL.

Notice the green URL link indicating the content is encrypted through NGINX!

Before continue reading further, you need to acquire a SSL certificate. I’m using a Let’s Encrypt free certificate. Here’s a guide on how to get it for a QNAP NAS.

Installing NGINX through docker is easy I used the image simply called NGINX. I mapped the folders “/etc/nginx” and “/usr/share/nginx/html” to local folders:

Picture 7. QNAP Container Station NGINX shared folders mapping.

Configuration of  NGINX is done through the file “nginx.conf” located in mapped conf folder. Below is an example of the config parts used by transmission:

upstream transmission  {
		server 192.168.2.3:9091; #Transmission
	}
	server {
		listen 443 ssl http2;
		server_name nas.filegott.se;

		### SSL cert files ###
		ssl_certificate    /etc/nginx/certs/chained.pem;
		ssl_certificate_key    /etc/nginx/certs/domain.key;

		### Add SSL specific settings here ###
		ssl_session_timeout 10m;

		ssl_protocols SSLv3 TLSv1 TLSv1.1 TLSv1.2;
		ssl_ciphers ALL:!ADH:!EXPORT56:RC4+RSA:+HIGH:+MEDIUM:+LOW:+SSLv3:+EXP;
		ssl_prefer_server_ciphers on;

		location / {
			return 301 https://$server_name/transmission/;
		}

		location ^~ /transmission {
			proxy_set_header X-Real-IP $remote_addr;
			proxy_set_header X-Forwarded-For $proxy_add_x_forwarded_for;
			proxy_set_header Host $http_host;
			proxy_set_header X-NginX-Proxy true;
			proxy_http_version 1.1;
			proxy_set_header Connection "";
			proxy_pass_header X-Transmission-Session-Id;
			add_header   Front-End-Https   on;

			location /transmission/rpc {
				proxy_pass http://transmission;
			}

			location /transmission/web/ {
				proxy_pass http://transmission;
			}

			location /transmission/upload {
				proxy_pass http://transmission;
			}

			location /transmission/ {
				return 301 https://$server_name/transmission/web/;
			}
		}
	}

This config above assumes you already have generated SSL certificate files in this case named “chained.pem” and “domain.key” and placed them accordingly (in this example “Share/Container/volumes/nginx/conf/certs/…”).

Installing Apache Guacamole using Docker on QNAP NAS (x86)

Apache Guacamole is a clientless remote desktop gateway. A web browser is the only requirement for you to be able to connect to your desktops. To set it up, all you need is these three docker images:

I could have used another database container, but I prefer MariaDB and it’s compatible to MySQL. I used the guide “Installing Guacamole with Docker” and it was “almost” all I needed. I therefore don’t feel it’s necessary to write a full guide as the existing one is great. I solved the SSL encryption via NGINX reverse proxy, guide.


Issues I did encounter

  1. The first issues I had was where to find the db schema for creating a new database from scratch. It wasn’t clear to me from the guide. You needed to download the guacamole-auth-jdbc-0.9.12-incubating.tar.gz and unpack it and
    in the “\mysql\schema” the files “001-create-schema.sql” and “002-create-admin-user.sql” can be found.
  2. QNAP Container station did not work with container linking when using “Bridge” mode (it assigns a new IP-address), but maybe that is how it should work.
  3. I had an issue after I got everything to working. I added a test (none-working) connection to the default user. Every time i tried to log on with that user it used that broken connection and it got stuck. So if a user only has “ONE” connection that will be automatically used when login in to Guacamole. I just just recreated the DB and made sure I created a test user to experiment with:)

Guacamole up and running

Picture 1. QNAP Container Station – Apache Guacamole containers

Picture 2. Apache Guacomole login

Picture 3. Guacamole connection screen.

Picture 4. Guacamole SSH shell

Picture 5. Guacamole RDP to Win10

Picture 6. Guacamole VNC to Ubuntu.

Configure a reverse proxy with NGINX

What is a reverse proxy (taken from wikipedia):

“In computer networks, a reverse proxy is a type of proxy server that retrieves resources on behalf of a client from one or more servers. These resources are then returned to the client like they originated from the proxy server itself”

So why do you want to use a reverse proxy? In my case it’s because I want to hide ports and instead forward request based on domain name. I also want to handle SSL encryption at one place. So even if I have a self signed certificate internally it will still show a green URL if NGINX is setup properly with a SSL CA.

Prerequisites

This config example assumes you have a DNS or DDNS already setup and a existing signed certificate from a CA (chained.pem and domain.key). The ports 80 and 433 on your router also need to forward request to your NGINX instance (in this example running on 192.168.2.1).

What I want to accomplish:

# Setup routing for Nas Management 192.168.1.4 (home.filegott.se)
http://home.filegott.se –(reverse proxy)–> http://192.168.1.4
https://home.filegott.se –(reverse proxy)–> https://192.168.1.4

# Setup routing for UniFi Controller 192.168.2.2 (unifi.filegott.se)
http://unifi.filegott.se –(redirect)–> https://unifi.filegott.se
https://unifi.filegott.se –(reverse proxy)–> https://192.168.2.2:8443

My nginx.config:

user nginx;
worker_processes  1;
events {
    worker_connections  1024;
}

http {
   include       mime.types;
   default_type  application/octet-stream;
   sendfile        on;
   keepalive_timeout  65;	
   server {
      listen 80;
      server_name home.filegott.se;
      location / {
            proxy_set_header   X-Real-IP        $remote_addr;
            proxy_set_header   X-Forwarded-For  $proxy_add_x_forwarded_for;
            proxy_set_header   Host             $host;
            proxy_pass http://192.168.1.4/;
      }
   }

   server {
      listen 443 ssl;
      server_name home.filegott.se;
      ssl_certificate    /etc/nginx/certs/chained.pem;
      ssl_certificate_key    /etc/nginx/certs/domain.key;
      location / {
         proxy_set_header   X-Real-IP        $remote_addr;
         proxy_set_header   X-Forwarded-For  $proxy_add_x_forwarded_for;
         proxy_set_header   Host             $host;
         proxy_pass https://192.168.1.4/;
      }
   }
	
   server {
      listen 80;
      server_name unifi.filegott.se;
      return 301 https://unifi.filegott.se$request_uri; 
   }
	
   server {
      listen 443 ssl;
      server_name unifi.filegott.se;
      ssl_certificate    /etc/nginx/certs/chained.pem;
      ssl_certificate_key    /etc/nginx/certs/domain.key;
      location / {
         # redirect all HTTPS traffic to 192.168.2.2:8443
         proxy_set_header   X-Real-IP        $remote_addr;
         proxy_set_header   X-Forwarded-For  $proxy_add_x_forwarded_for;
         proxy_set_header   Host             $host;
         proxy_pass https://192.168.2.2:8443/;			
         # WebSocket support
         proxy_http_version 1.1;
         proxy_set_header Upgrade $http_upgrade;
         proxy_set_header Connection "upgrade";
      }
   }
}

I had to add three extra lines for support of webSockets for my UniFi Controller. Also worth mentioning is that the certificate used is signed for use of both domains: home.filegott.se and unifi.filegott.se.

Setup Let’s Encryp Free SSL on QNAP NAS (TS-453A)

I just ended up using Yannik’s Git repository containing a already working shell script. The script uses acme-tiny to get a Certificate from Let’s Encrypt. Follow the instructions, if you’re a Windows user I recommend Putty. The only issue I had with Yannik’s guide was installing Git, see below:

Installing Git on QNAP TS-453A 

Getting Git running on my QNAP TS-453a was harder than i thought. I couldn’t find Git anywhere in “App Center”. Eventually I found a git qpkg file (QNAP application Package) that could be installed. I could only get version 2.1.0 working.

  1. Download Git: “git_2.1.0_x86.qpkg
  2. Install Git in qnap: Go to qnap “App Center” and press on settings in top right corner. On tab “Install Manually” select “browse…” and upload/install the file above. Done!

Setup DDNS with FreeDNS

This guide if for those that want a domain name for their private server/network but doesn’t have a static IP-address. No worries, this can be accomplished through a Dynamic Domain Name System (DDNS). There are many free suppliers av DDNS but they all work in a similar fashion, below is a guide for using FreeDNS.

Note, If you do have a static IP-address and a hosting provider:

The best thing is probably just to configure a CNAME DNS setting with your hosting provider and point a sub domain to your static IP-address. Example:

Domain Type Value
home.filegott.se CNAME 85.230.180.186

Depending on your hosting provider this can be done differently usually through a GUI.

Setup DDNS (using FreeDNS)

  1. Go to freedns.afraid.org and get a user account.
  2. Log in and create a DDNS by pressing “Dynamic DNS” and scroll down and press “[add]”:

    Picture 1. FreeDNS add DDNS.

    Fill in the fields and press “Save!”. In this example i created the DDNS filegott.crabdance.com.

  3. Update DDNS with a new IP-address. There are many ways of doing this but maybe simplest is using:
    http://[USERNAME]:[PASSWORD]@freedns.afraid.org/nic/update?hostname=filgott.crabdance.se&myip=85.230.180.123
    Verify through FreeDNS webpage the IP-address got updated.
  4. Setup automated update of IP-address. When doing this we don’t want to use the unencrypted HTTP url above but instead a safer HTTPS url, maybe through curl or Wget. There are example scripts ready to be downloaded from the page:

    Picture 2. FreeDNS download different update scripts.

    Scheduling can be done through Task Scheduler (Windows) or crontab (linux). I actually used my “router” as it already had support for FreeDNS.

Extra credit: CNAME a prettier domain name as DDNS (if you have a hosting provider)

My hosting provider doesn’t provide a DDNS service but they do enable users to create their own sub-domain and link them to other addresses:

Domain Type Value
home.filegott.se CNAME filegott.crabdance.com
unifi.filegott.se CNAME filegott.crabdance.com

So now by using the CNAME the browser will still display home.filegott.se but will be using the DDNS to get the correct IP. As you noticed I even added another domain that points to the same DDNS (IP-Address), why you ask? This is because I have NGINX reverse-proxy listening at filegott.crabdance.com that directs the request differently depending on the domain name used in request url.